IoTeX launched its Mainnet on 1 June 2020. It’s a revolutionary Blockchain of the Internet of Things that is moving towards increasing its ecosystem in 2021. It has a faster throughput than the Ethereum Network and impressively lower fees too.
That is why you will benefit from transacting over the IoTeX network instead of Binance Smart Chain or Ethereum Mainnet.
So, how do we transact with lower fees and faster transaction settlement? #
We will need the following prerequisites before we can follow this tutorial. We will need:
- A Web3 Wallet. (As We will be using Metamask, it would be easier for you to follow the instructions if you also use Metamask Wallet. If you don’t have it, you can download it from https://metamask.io/download.html)
- IoTeX on your Metamask Wallet. Refer to the article How to Buy IoTeX if you want to see the tutorial on how you can buy it safely.
Now that we have all the aspects to move forward let’s get started.
Step 1 – Deposit on Binance #
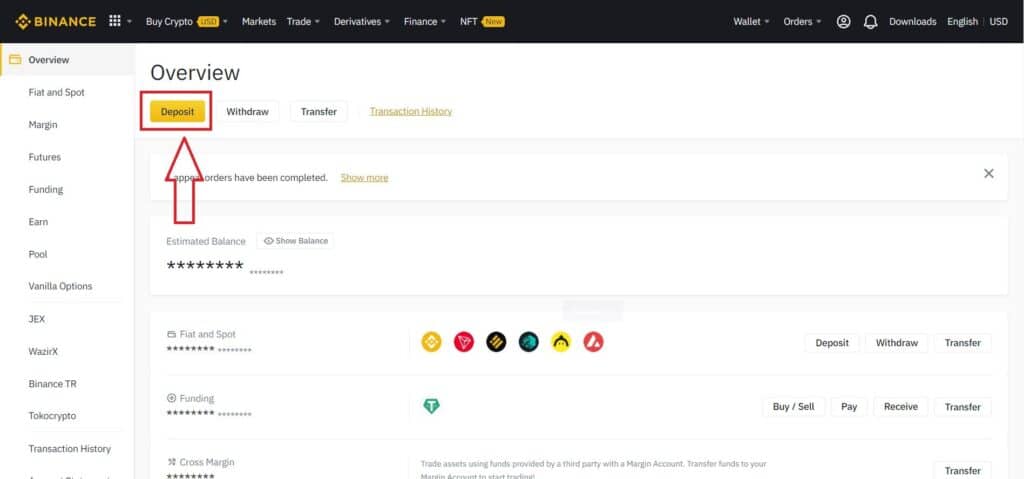
We will be using Metamask Web3 Wallet in this example and deposit IoTeX on Binance using IoTeX Network. So, first log into the Binance account and click on Deposit.
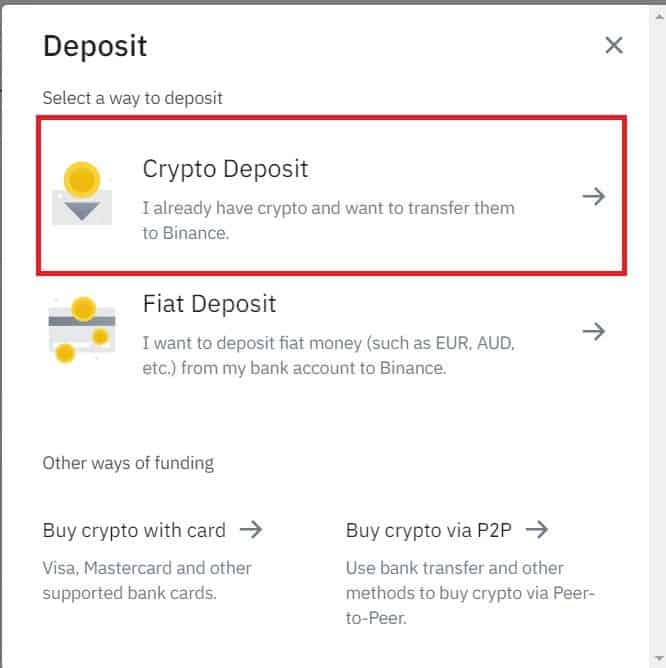
Step 2 – Select Crypto Deposit #
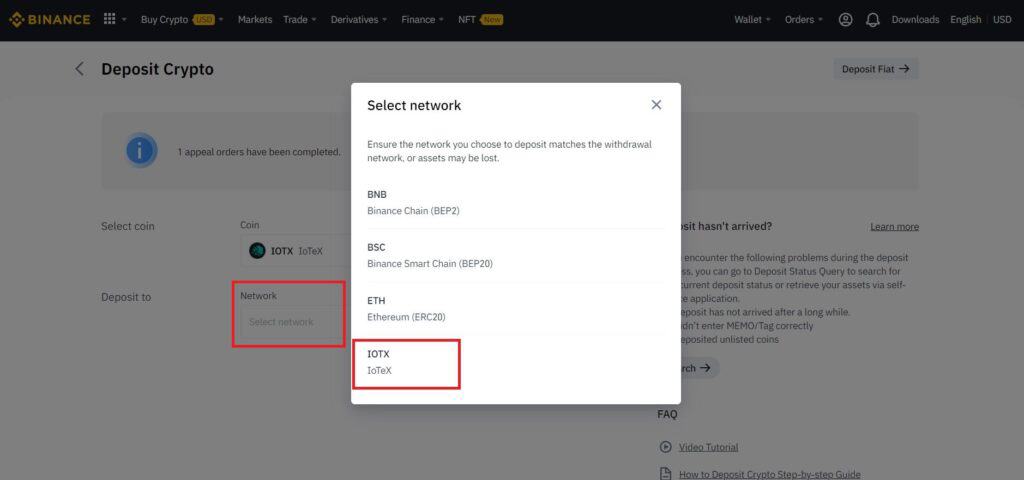
Step 3 – Select IoTeX from the Box. #
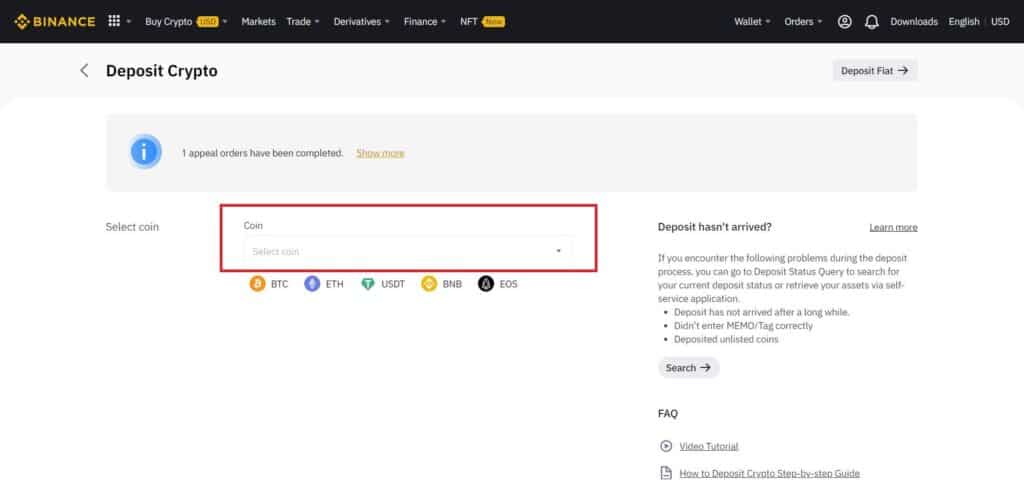
You can simply start typing IoTeX and the coin will appear.
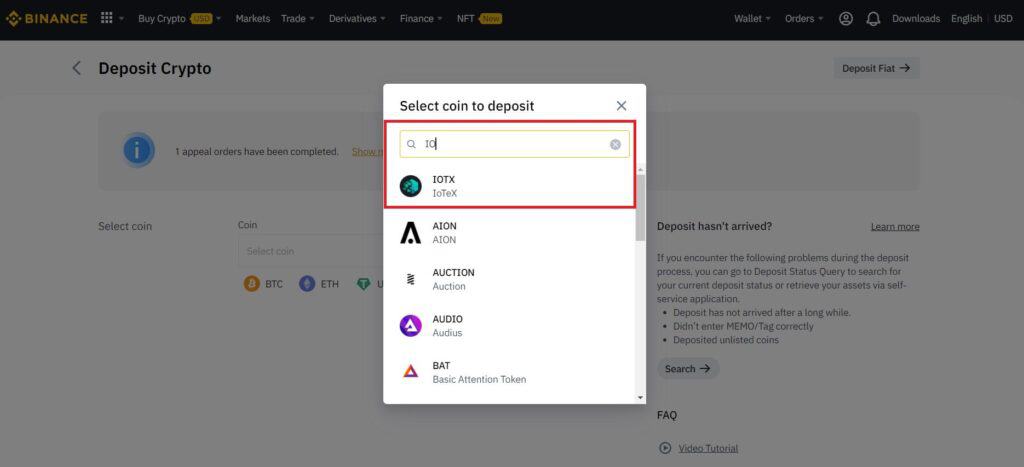
After choosing IoTeX make sure to choose the IoTeX Network from the Network list.
Step 4 – Your IoTeX Address #
Once you have chosen IoTeX from the Coin selection and IoTeX network from the Network selection, it will reveal your IoTeX deposit address.
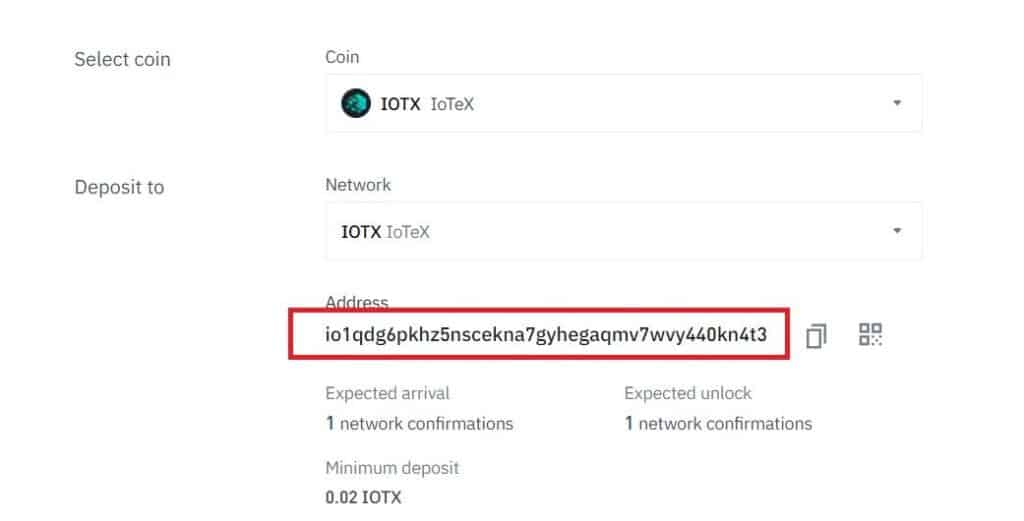
Copy the address and head over to your IoPay wallet.
Step 5 – Access IoPay #
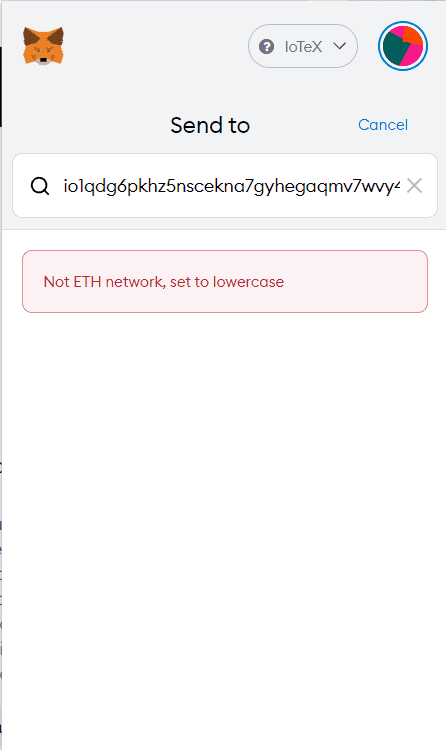
Access your ioPay wallet and login to your ioPay wallet address. If you are using Metmask and if you try sending to the IoTeX email address, you will get a response like the following screenshot:
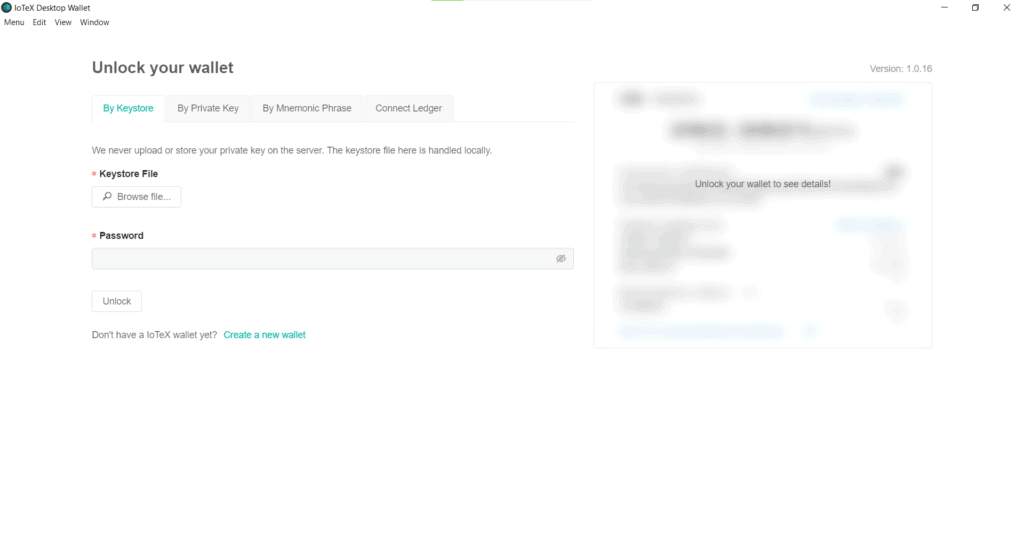
So, what we will be doing is, we will open the address using ioPay wallet. To, do so launch the ioPay wallet app. We are using ioPay Windows app in the tutorial so our app interface looks:
Step 6 – Fetch Your Private Key #
Once you have opened the ioPay Wallet app, it’s time to fetch your private key from your Web3 wallet. Click on the three dots > click on Account Details > Click on Export Private Key
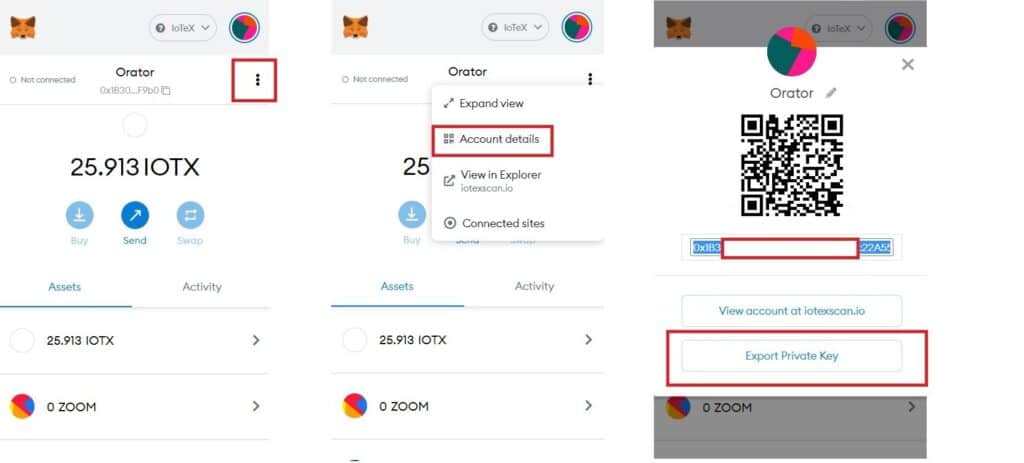
Important Reminder: Never share your private key or Mnemonic Phrase with anybody. If anybody is asking you for that, he is a scammer. Sharing these resources will make your wallet compromised and anybody who have access to these data will have access to your wallet. That is the reason we did not reveal the private key of ours. But the screen will look something like:
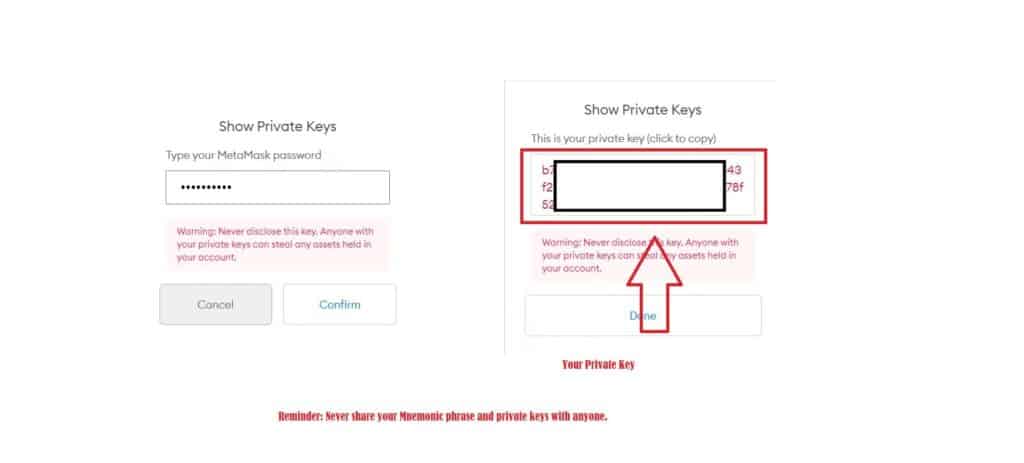
Step 7 – Unlock Your Wallet #
Once you have copied your private key, head over to ioPay wallet and paste the Private Key by choosing the option By Private Key.
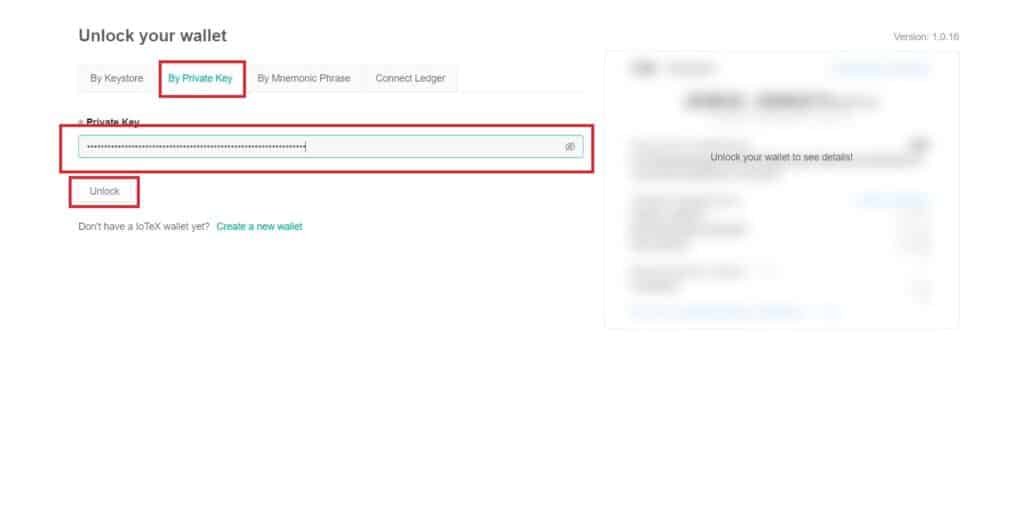
This will help you open your ioPay wallet on your ioPay app.
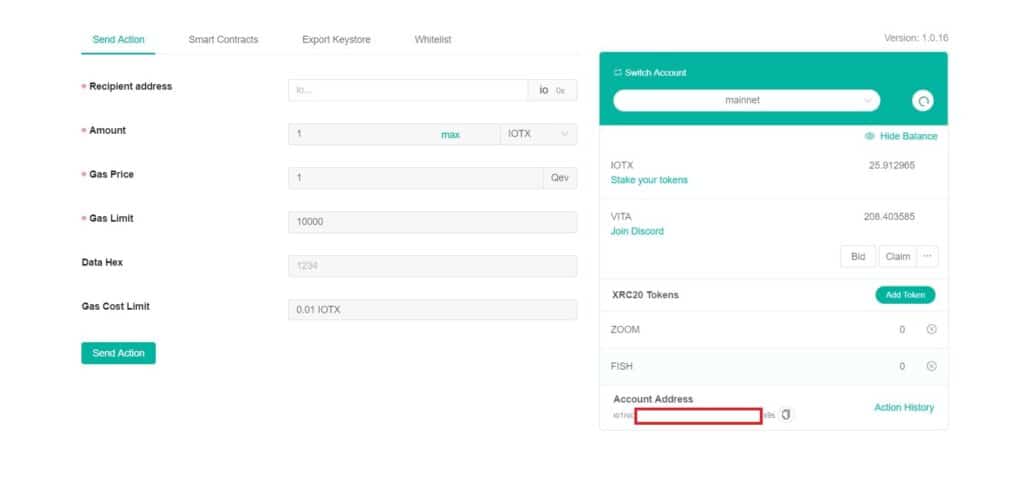
Now, you can simply copy your Binance Deposit address and put it on the Recepient address, inpu the amount that you want to send, and hit on Send Action button.
Congratulations! After signing the pop up, you will have successfully sent the IoTeX on to your Binace account using the IoTeX Network for less than a penny within a few seconds.
Tip: An ioPay wallet address will start with io as opposed to 0x. If you ever see a wallet address starting with io, be sure that it’s a ioPay wallet address and you need to send funds using IoTeX network to these wallet addresses. Otherwise you will lose your funds. Blockchain transactions are irreversible. So, if you are unsure about anything, always try sending a smaller amount first to be sure that you are doing everything right.